Wednesday 27 November 2013

FLOWER POWER - 2

This is the second part of my recap of the flowers I have made. If you have missed the first part please hop over here.
As a part of my DT inspiration for the Color Conceptions blog, I had made two tags which you can see here. You all know how I love to play around with techniques. When I chanced upon this particular tutorial I had to try it out.

Sharing step by step photo instructions on the making of these blooms.

Stamp the images (penny black petal party), color using distress inks (mustard seed & spiced marmalade).


Sprinkle some beeswax (fortunately I had this in my stash). Melt the beeswax by gently ironing over, of course by protecting between layers of paper. Make sure the wax spreads evenly across the flowers.


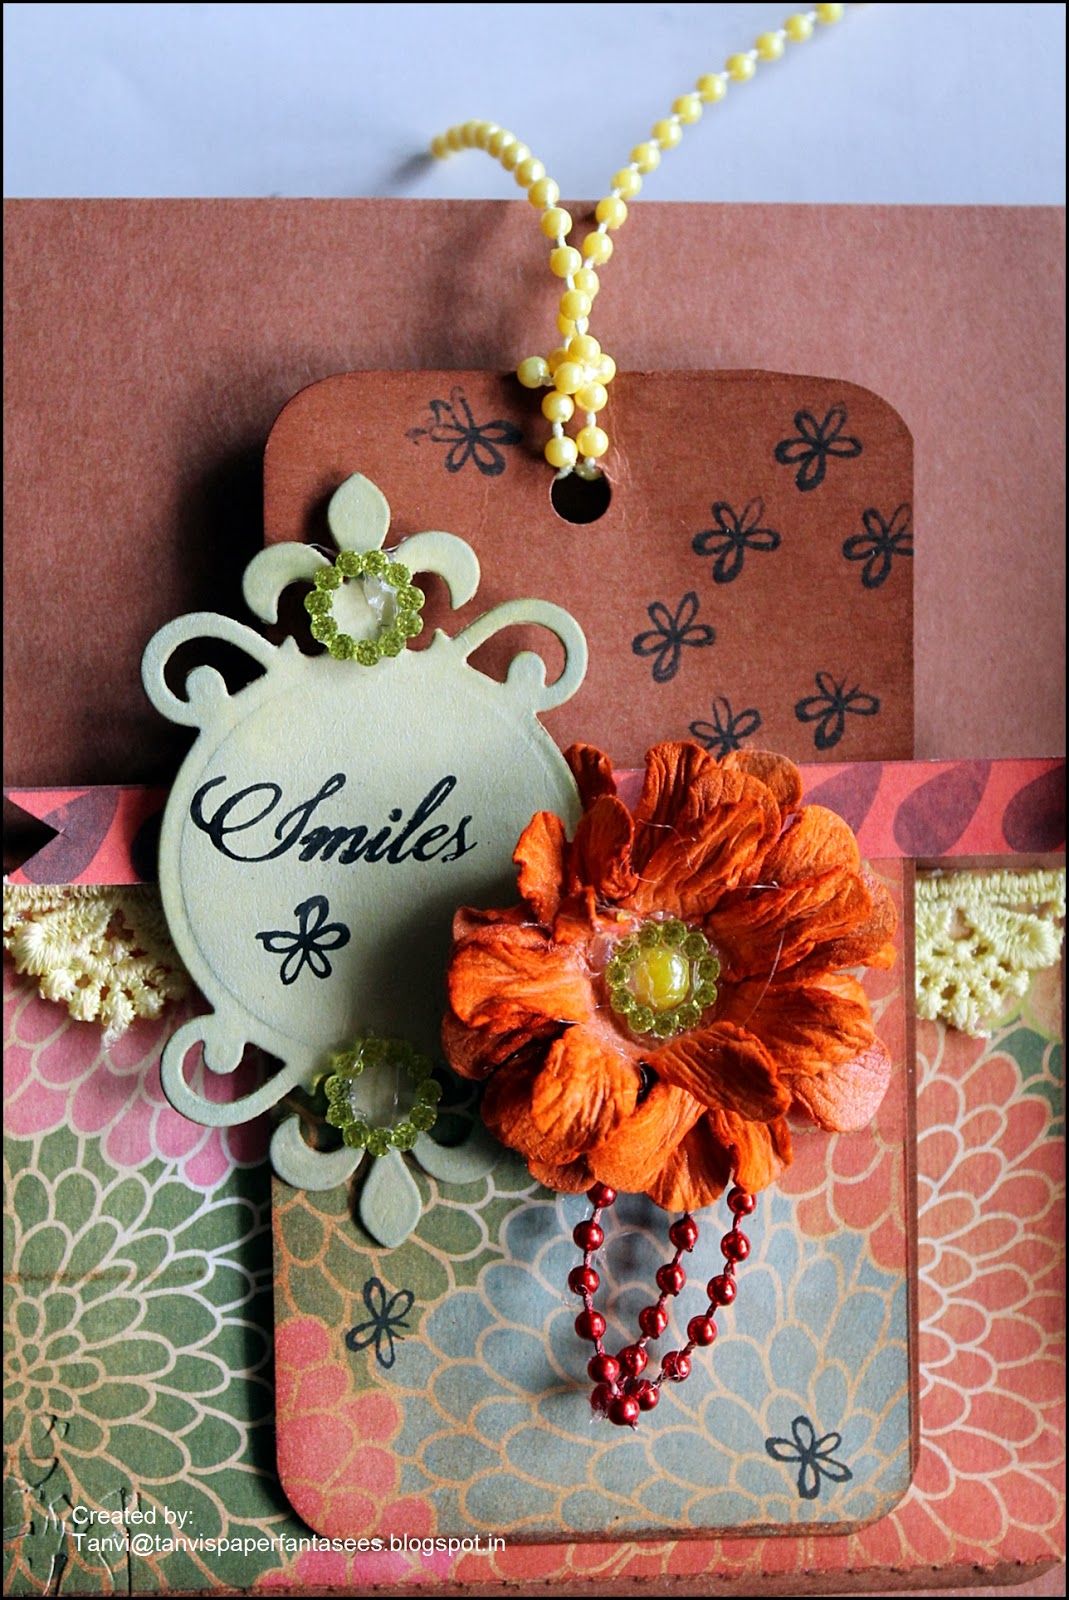
Viola there you have a super glossy, shiny coat over the flowers & believe me these are beauties in real. Try dusting perfect pearls................as I have done in one set.


Glue the two layers...................


Another attempt using Tim Holtz tattered florals die cuts. Before assembling the flower try adding some texture using a embossing folder (Darice - basket weave)


Closer look at this elegant bloom..................


Thank you so much for visiting & taking the time to comment on my blog. I love to hear from you & truly appreciate your feedback. Have a crafty day!!

FLOWER POWER - 1

Hello friends!!
Last week as I was going through some of my blog pictures I realized I had made many handmade flowers. By altering the technique, color, assembly, embellishment on the same die cuts you can have a new bloom to coordinate every project. I thought it would be a good idea to recap all these in a post.

1.I had purchased some flower die cuts locally (back then I did not even own a big shot). I have followed the tutorial link here which Rajni shared in her post for the Color Conceptions blog. Layering & pinching the petals resulted in this gorgeous bloom. For the shimmer I have sprayed Lindys Gang Spray.


You can view the projects on which I used these here, here

2.These shabby chic blooms are again from ready die cuts - FabScraps, a rolled flower & paper rose.


3.Here I have used the same technique as the first using Tim Holtz tattered florals die cuts (pink) & the other one is FabScraps.


4.This one too is the same FabScraps die cut but note the variation - layering & curling.


5.Next up are some flowers using Cheery Lynn - Build a flower#3 dies, scallop circles & tattered floral die cuts.


I have used some of these blooms in the hanging keepsake here & also on the card here.


6.In the following pictures you can see the variation that can be obtained by changing the colors, embellishment used in the centre, layers, cupping the petals (inside/outside) on die cuts.


All these adorn the note-pads I made for my daughters' teachers which can be seen here.

I have some more to share in my next post so stay tuned.

Thats it from me today....................thank you so much for visiting & taking the time to comment on my blog. I love to hear from you & truly appreciate your feedback. Have a crafty day!!

Saturday 23 November 2013

Tea light Candle Holders


Hello Friends!!
Sometime back I had ordered a few tea light candle holders from Craftslane. These were perfect diwali gifts for friends. It is also a good way to utilize small pieces of scrap pattern paper. Have used a variety of pattern papers here.


Thank you so much for visiting & taking the time to comment on my blog. I love to hear from you & truly appreciate your feedback. Have a crafty day!!

Friday 22 November 2013

Create A Scene Cards

A super quick post to share two cards I made this month for the Color Conceptions Challenge Blog.
Hop over to the blog for details.


Thank you so much for visiting & taking the time to comment on my blog. I love to hear from you & truly appreciate your feedback. Have a crafty day!!

Friday 15 November 2013

A CHRISTMAS TAG

Here is a Christmas tag I made keeping in mind a few challenges. I have done some stamping on the base of this tag & added a few layers. The focal point is the ornament & wreath (made from punched leaves) & how can I miss a Christmas tree................that tiny little brad!


The mdf snow flake is heat embossed in silver embossing powder........


I am linking this to -
Lulupu Challenge#20 - Special Mention

Hope you all like this. Thank you so much for visiting & taking the time to comment on my blog. I love to hear from you & truly appreciate your feedback. Have a crafty day!!

Thursday 7 November 2013

A Book Box

Hello Crafty Ladies!
I am back with another box (you can find the double slider vintage box here) made following the tutorial here. Enjoying making these gift boxes as they serve the dual purpose of a card & also can hold a gift. This box was made for a crafty friend & I hope she likes it. 
I started with brown card stock to make the box which was then layered with coordinating PP & embellishments. 


The box also has a pocket to hold a tag & a faux frame which can hold a small gift.


This bloom is handmade & sprayed the Lindys Gang Spray for the shimmer.....


The pattern paper & red glitter embossing powder used on the die cut are from ITSY BITSY


Another view.......


The tag inside, embellished with a handmade bloom.


Linking this to the following challenges - 
BGC#42 (Lindy's Gang Spray & Glitter embossing powder) - Winner

Thank you so much for visiting & taking the time to comment on my blog. I love to hear from you & truly appreciate your feedback. Have a crafty day!!
Related Posts Plugin for WordPress, Blogger...