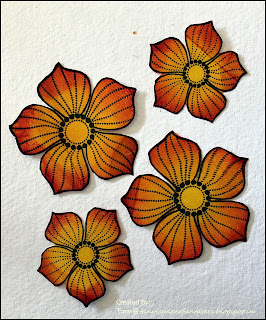
This is the second part of my recap of the flowers I have made. If you have missed the first part please hop over here.
As a part of my DT inspiration for the Color Conceptions blog, I had made two tags which you can see here. You all know how I love to play around with techniques. When I chanced upon this particular tutorial I had to try it out.
Sharing step by step photo instructions on the making of these blooms.
Stamp the images (penny black petal party), color using distress inks (mustard seed & spiced marmalade).
Sprinkle some beeswax (fortunately I had this in my stash). Melt the beeswax by gently ironing over, of course by protecting between layers of paper. Make sure the wax spreads evenly across the flowers.
Viola there you have a super glossy, shiny coat over the flowers & believe me these are beauties in real. Try dusting perfect pearls................as I have done in one set.
Glue the two layers...................
Another attempt using Tim Holtz tattered florals die cuts. Before assembling the flower try adding some texture using a embossing folder (Darice - basket weave)
Closer look at this elegant bloom..................
Thank you so much for visiting & taking the time to comment on my blog. I love to hear from you & truly appreciate your feedback.
Have a crafty day!!


Beeswax tech looks fabulous
ReplyDeleteThanks for the bees wax technique...where is it available?
ReplyDeleteRupa it should be available in craft stores, I had bought it when I was in Mumbai.
DeleteYeah Its looks very interesting !Thanks for sharing Tanvi !
ReplyDelete