Showing posts with label die cutting. Show all posts

Saturday, 21 July 2018

Itsy Bitsy Thincuts - Watering Can

Hello folks!
Itsy Bitsy has recently launched 15 new designs to add to their Thin Cut Dies collection. Each one of these is beautiful & I was sent this adorable Watering Can Set. 
I love plants & am blessed to have my studio adjacent to my terrace garden.
As soon as I received this die I knew I wanted to make plant markers.
Out comes my DREAM CUT & within minutes I have them ready, using the watering can die.


Isn't it cute! 


Next I have a couple of cards. For the first one I created a garden scene with the die cuts & rub ons. The bricked wall is a pattern paper from the "Texture Brew" pack. Colored the flowers black & leaves green with Alcohol Splash and the can with distress ink.


The next card is in the classic never fail black & white combination - 


I have layered a panel of corrugated white card stock over a white card base. The chevron pattern of the watering can is the only pop of color in this elegant card. The flowers too are die cut from the same corrugated paper. 
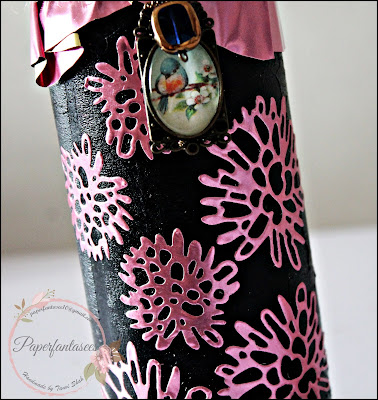
Here is a closer look at the texture of these flowers - 


The last one is my favorite!
Here I created a distress ink background & some splatters with water & Alcohol splash. Inlaid the watering can diecut in the background & used some gorgeous Little Birdies handmade flowers


You can grab these affordable dies from the nearest Itsy Bitsy store or place an online order here. 

Thank you so much for visiting & taking the time to comment on my blog. I love to hear from you & truly appreciate your feedback. Have a crafty day!

Wednesday, 4 April 2018

Bag Charm using Rine Foil paper

Hello & Welcome back!
Rinea foil papers are very versatile & I love the ease with which they can be used in many paper craft projects. 
Today I have a quick pictorial to make a carrot favor box for Easter.
This cute favor box was perfect for the bag accessory I made using some charms & die cuts from Rinea foil paper.
For my post today I have used the following foil papers - 
Thank you so much for visiting & taking the time to comment on my blog. I love to hear from you & truly appreciate your feedback. Have a crafty day!

Wednesday, 15 November 2017

Christmas Banner

Hello, Tanvi here bringing you some inspiration for Christmas! My project share today is a banner, I made this using the crafter's roll of Ruby/Gold Glossy foiled paper3D rolled star die setEmerald/Gold Glossy foiled paper.


I used some dies & embellishments from my stash to make this banner. The rich & festive colors of the foiled paper make such a beautiful banner!


Sharing this at - 
CHNC#359 - 17.11

Thank you so much for visiting & taking the time to comment on my blog. I love to hear from you & truly appreciate your feedback. Have a crafty day!

Sunday, 1 October 2017

Card with a Gift Box

Hello, All!
I am back Awith a tutorial to make a card with a gift box! Interesting, isn't it? This is based on a tutorial here, I recently came across.

Gift box in a card using Rinea Foiled Paper

Here are the steps to make one -
  1. Take a piece of black cardstock 8 ½ x 11".  Score at 5½" on the long side to make a top fold card base measuring 5 ½ x 4 ¼".
  2. Mark a 2 x 2" panel (folded side up) about 1" from the right side of the card base.
  3. Trim off this piece as shown below (when unfolded it will measure 2x4")
 
4. Make a box measuring 2x2".
    To decorate the gift box cum card I have used sapphire/gold glossy foil paper.


    Gift box in a card using Rinea Foiled Paper

    Sharing this at the following challenges -
    Simon Says Stamp - Monday Challenge - 1.10
    Simon Says Stamp - Wednesday Challenge - 3.10
    NBUS Challenge #12 - 3.10 (NDUS is the embossing folder)

    Thank you so much for visiting & taking the time to comment on my blog. I love to hear from you & truly appreciate your feedback. Have a crafty day!

    Thursday, 14 September 2017

    Wedding Invite using Rine Foiled Paper

    Hello & Welcome back!

    Rinea foil has paper-like properties & can be used with standard dies with ease. For my project today I used a very intricate Spellbinders die (Tranquil Moments) for a wedding invite. Without much effort except running the sandwich several times through the cutting plates, I got fantastic die cuts. Here is the card -


     Isn't it gorgeous????


    The intricate die & the star struck foil in fuchsia  were just perfect! So much depth & dimension!


     I have another version of this card too............Indian version as I call it! The paisley embellishment is perfect, do you agree!!!


    Thank you so much for visiting & taking the time to comment on my blog. I love to hear from you & truly appreciate your feedback. Have a crafty day!

    Monday, 28 August 2017

    DIY Mason Jar Tissue Holder


    Hello, I am at the Rinea Blog today with a gorgeous makeover of the good old mason jar. I have upcycled it for use as a tissue holder.


    The foil cuts like butter with all dies!
    For this project I have used blush gold foil from the jewel variety pack,  I can't get my eyes off this adorable combination of black & blush gold foil!


    Thank you so much for visiting & taking the time to comment on my blog. I love to hear from you & truly appreciate your feedback. Have a crafty day!

    Sunday, 9 July 2017

    Shabby Chic Banner

    Hello Friends!

    So glad you are here today!
    This week I am Guest Designing for the Crafting by Designs blog for their July Challenge - Anything Goes.

    I made a shabby chic burlap banner, very different from my style. 

    Hope you all like it!


    The ornate chipboard letters are sprayed with gold alcohol splash


    Sharing this at - 
    Cookie-challenge-72 (inspired by the colors & the burlap pattern on the cookie) - 12.7 


    Loads of products used here are from Itsy Bitsy

    Sizzix Banner Die


    Thank you so much for visiting & taking the time to comment on my blog. I love to hear from you & truly appreciate your feedback. Have a crafty day!

    Friday, 30 June 2017

    Mocha Happy!


    Hello & welcome back!
    Its the last day of the Summer's Coffee Lover's Blog Hop & 
    I managed to brew another card while sipping my cuppa BRU (my fav coffee!) 

    For this card I first created a MOCHA patch in the card base, using vintage photo distress oxide & gold alcohol splash splatters. I then spritzed some water for added texture. Loved the gold shimmer of the alcohol splash. The image from Newton's Nook is colored with copics & sentiment is from Altenew. To finish the card I added a few coffee stains & this sort of brought the layout together!


    I like to use gold alcohol splash in my cards because the gold kind of resists layers over it! A closer look at this image & you will understand what I mean! 


    Linking this to - 


    Supplies used - 
    Memento - Tuxedo black
    Newton's Nook - Newton Loves Coffee
    Altenew - Coffee Talk
    Copic Markers
    Your Next Stamp - Enamel Dots/gum drops
    Archival Ink - Coffee
    Simon Says Stamp - Stitched rectangle & circle dies

    Thank you so much for visiting & taking the time to comment on my blog. I love to hear from you & truly appreciate your feedback. Have a crafty day!

    Wednesday, 28 June 2017

    Cards - Rinea foil

    Hello Friends!
    Today I am at the RINEA blog with these two cards.
    The first one is a simple word shaker card. For the front card base I have used Glossy Ruby/Gold from the Jewels Foiled Paper Variety Pack


    I love the glossy ruby foil peeking in the shaker window! Simple but an absolute classy card!


    The second card is in one of my favorite white & silver combo. For this card I die cut a large butterfly in the front panel of the card base. Used  Silver/Silver Glossy Foiled Paper on the backside to cover the window. Also die cut some smaller butterflies to add some dimension. Rinea foil cuts so easily with any standard die. The sentiment is heat embossed.


    I also embossed the die cut to pop the wings.


    Linking this card to the folowing challenges - 


    Thank you so much for visiting & taking the time to comment on my blog. I love to hear from you & truly appreciate your feedback. Have a crafty day!
    Related Posts Plugin for WordPress, Blogger...