Showing posts with label mulberry flowers. Show all posts

Monday, 29 January 2018

Accordion Tag Mini Album

Hello Friends!
Welcome back.....sharing my inspirational post for the Rinea blog this month.
I am amazed everytime I work with Rinea foiled paper be it die cutting, SVG files, stamping, 3D projects, bags, boxes, banners.......this unique foiled paper never fails.
Look at the magic created by combining the foiled paper with pattern paper in this mini album. 
Here is how I made this accordion pocket mini album.
Gather your supplies -  For this mini album, I am using Rinea foiled paper Jewel Variety Pack & Peacock Variety pack, pattern papers, chipboard, standard envelopes (10x4.5"), trimmer, scale, glue, tacky tape, embellishments.
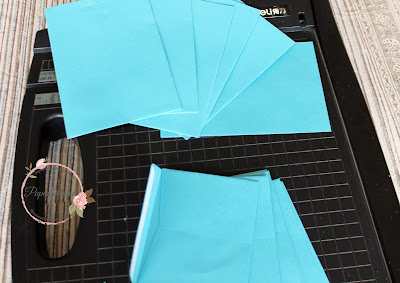
Trim off the flaps of the envelopes to measure 6.25". I am using six envelopes. You can seal the trimmed flaps with double sided tape & make another smaller album.
Next trim the -
card stock - 4 1/4x6.5" - 6 pieces
Pattern paper - 4x6.25 - 6 pieces
Chipboard - 5x7.5" - 2 pieces, 1.5x5" - 2 pieces, 2x5" - 1 piece

Now we prepare the album covers. This is how we place the chipboard & make the cover with cardstock. 

Using red tacky tape to glue the cardstock to the chipboard

To make the accordion pockets glue the trimmed envelopes as shown here - 

Glue the first & the last envelopes to the insides of the album covers & the accordion pockets are ready. To make the tags, decorate with pattern paper & embellies as desired.

Here are images of the finished album - 


 have made a magnetic closure for this tag album.


Love the combination of the foiled paper with pattern paper, classy & elegant!

Thank you so much for visiting & taking the time to comment on my blog. I love to hear from you & truly appreciate your feedback. Have a crafty day!

Tuesday, 10 May 2016

Double Easel Card with tags

Good Morning!
When I received the Bob N Betty - Amor Mio collection I was amazed at the endless possibilities the paper pack offered. It had tags, frames, paetterns to make embellishments, sentiments & even layouts! I wanted to incorporate so many of these elements in my card. So here it is a beautiful romantic but vintagy double easel card. Hop over to the blog here, where I share a pictorial to make this. Hope you enjoy it!


Sharing this at - 


Thank you so much for visiting & taking the time to comment on my blog. I love to hear from you & truly appreciate your feedback. Have a crafty day!


Monday, 11 April 2016

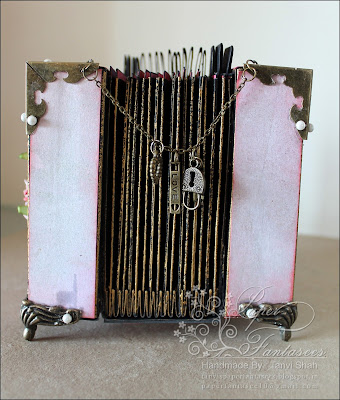
Accordion Tag Box

Happy Monday Friends!
I love making albums & this popular Accordion Tag Box has been on my to do list for long.
Sharing the one I made for a couples' 25th Anniversary. For the accordion tag box I have combined papers from two stack - Papericious - Infinty stack & Prima - Firefly stack. Mulberry flowers, charms & chains, metal corners & high lights with inkagold all coordinated perfectly to make this gorgeous box. 
Here are some close ups - 


Linking this to - 

Thank you so much for visiting & taking the time to comment on my blog. I love to hear from you & truly appreciate your feedback. Have a crafty day!

Monday, 4 April 2016

DREAM Banner

Hello Friends!

My DT project for Bob N Betty this time is a "DREAM" banner which originated in a quote I once read  'IMAGINATION is the soil that brings DREAMS to life'. When I received the DT kit I was awestruck with these Made in India papers, absolutely enticing! 

For making this banner I used die cut pennants for the base. I glued together 4 card stock die cuts for each pennant to make the base sturdy. 

I selected papers from the Floral Logs collection & trimmed them to size to layer over the die cuts. These designs are have so much of layering & textures in the patterns, so I wanted minimal embellishments!


I colored the Prima DREAM letter resins with black soot distress ink with a dash of gold acrylic paint. To coordinate the pennants & also the Tim Holtz word bands, colored them similarly.


Once I had the letters D R E A M placed on the pennants, I embellished them & look at the magic created using these papers! Fantabulous!
The metal word bands have some inspiring words which were just perfect to for the theme I had in mind - Imagination & dream! 
I wanted these to standout clearly on the banner, so added these to square die cuts to the base of the banner.
The glass beads & tassels were just perfect to complete the banner.


The Ornate Annie collection has some sheets with tags, envelopes, frames, etc which can be easily fussy cut & I thought it would be perfect to add some interest & provide a good contrast  for the resin letters.


Linking this to - 
Craft for the Craic   - 30.4
ABC-Challenge - 13.4

Thank you so much for visiting & taking the time to comment on my blog. I love to hear from you & truly appreciate your feedback. Have a crafty day!

Friday, 18 March 2016

Magnetic Chopping Board

Hi Friends!
I am here with my second post for Stamplorations. You can check the first post post here & the challenge details here. The sketch for March is this - 


Stamps & Textures is the theme this month.


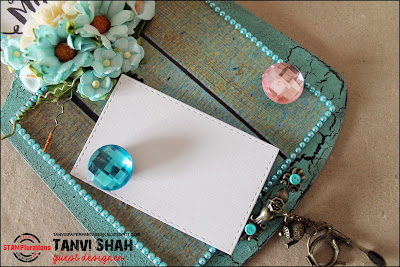
For my project I altered a mini chopping board into a magnetic one! 
My project started with a black base coat on the MDF surface. Wanted to add lots of textures here, so gave a coat of crackle medium followed by chalkboard paint. Loved the resulting cracks!


 Keeping in mind the theme stamps, I used the Big on Words - Mom digi that Shery sent me as a focal point here. 


I then glued a magnetic sheet to the prepared surface & selected a pattern paper with wood pattern for some more textures. The large magnetic rhinestones can hold those little to do notes or reminders. Perfect for the kitchen!


These teapot & spoon charms dangling over a mini handle & blooms were perfect coordinates for the magnetic board! 


Sharing this at - 


Thank you so much for visiting & taking the time to comment on my blog. I love to hear from you & truly appreciate your feedback. Have a crafty day!
Related Posts Plugin for WordPress, Blogger...