Showing posts with label stencil. Show all posts

Saturday, 23 February 2019

Art Journal Page - HOPE

Hello!
The Simon Says Stamp Wednesday Challenge is a very interesting one this week - No Stamps Allowed.
For my journal page I created the background using gelatos, lots of stenciling with modelling paste & archival inks. The hydrangeas are fussy cut from pattern papers & so is the quote. The black  flowers & motifs are rub ons.

Sharing this at the following challenges - 
Art playground - 28/2 (flower & leaf shapes)
Thank you so much for visiting & taking the time to comment on my blog. I love to hear from you & truly appreciate your feedback. Have a crafty day!

Saturday, 8 September 2018

Rust Effect Wall Decor

Hello everyone, am so glad to see you here again.
Its a Mixed Media wall decor for my LETZCRAFT DT post today, using CrafTangles Rust paste. This set contains thick matte textured paste which creates rust like effect which dries permanent. These water based pastes can be applied to almost any surface like canvas, wood, paper, metal etc. making it very versatile.

I started with a MDF base which I layered with black gesso. Assembled a few embellishments from my stash & covered them with gesso too. The dream catcher is the focus here to coordinate with LIVE YOUR DREAM. Added some more texture on one side using sand paste
All the embellies were glued to the base with Glossy Accents.
For the rust effect I started with the dark brown paste, dabbing it all over with a sponge dabber.
Next random layering with the rust colored paste, leaving some brown showing beneath. While creating the effect, using the other shades of yellow as required to get the faux rust look.


The dark brown paste creates a very gritty texture


Here are some close ups, I am loving the effect!


I am totally loving this effect & my hands are itching to work with the patina pastes now!

Thank you so much for visiting & taking the time to comment on my blog. I love to hear from you & truly appreciate your feedback. Have a crafty day!

Monday, 14 May 2018

Decoupage Mixed Media Canvas


Hello Friends!
 I am loving the new range of Bob N Betty decopatch papers - very high quality 50gsm papers, a dream for all decoupage artists. You can check my previous posts with this awesome release here & here.


These papers are very thin & blend easily into the background to give a seamless finish, they truly do! Check the canvas I share today -


Stay with me as I take you through the steps to combine decoupage & mixed media to create unique wall decor for your homes.
The USP of these papers is the ease with which you can use them on surfaces, just like rice papers & tissues. To highlight this I started by creating a textured base for the 12x12 canvas.


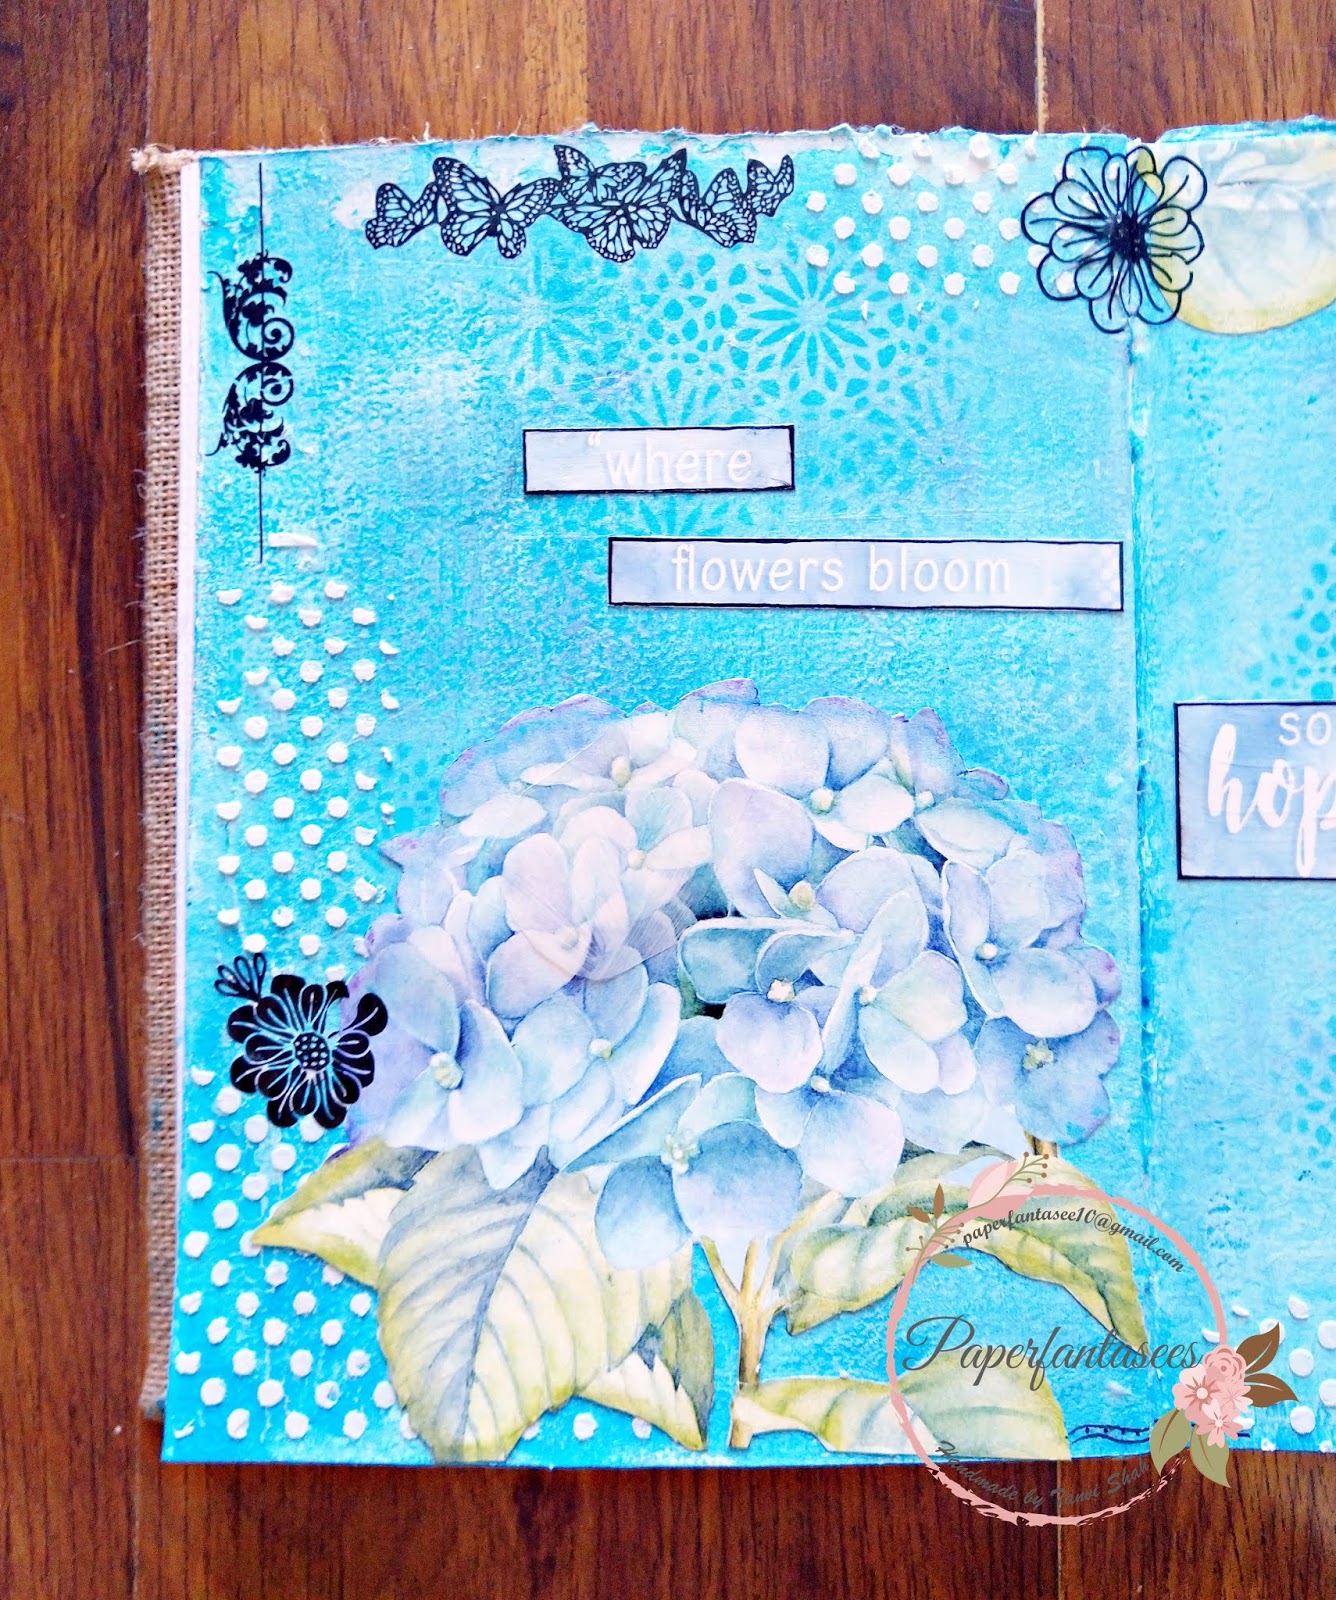
Next I fussy cut a section (OLD WORLD CHARM sheet) & also some elements from the FLORAL ADORNMENTS sheet. I decided on the layout & decoupaged them on the textured canvas.


Here is a close up to show how easily it blends on the textured background.


Next I colored the canvas with coordinating chalk paints.


Some random stencilling & stamping over the textures -


To add some more textures I stenciled clear crackle paste on the edges & added some paste with the palette knife too.


To finish the canvas I splattered acrylic paint.  The Crackle paste dries clear over the textures to reveal the background through. the cracks, perfect for the image I selected! Spray with acrylic varnish to seal the canvas.


 You can grab these papers from any of our Sales Buddies   &  share your gorgeous creations using Bob n Betty papers with us on our facebook group Bob n Betty Buddies. 
Thank you for visiting & happy crafting!
Thank you so much for visiting & taking the time to comment on my blog. I love to hear from you & truly appreciate your feedback. Have a crafty day!

Tuesday, 24 January 2017

Stamplorations - I LOVE COFFEE


Hello Friends!
Sharing a card I made using the January sketch at Stamplorations


To make this one layer card I first masked a rectangle on the card panel & stenciled over the masked area following the layout in the sketch. I then stamped the coffee cup ( Coffee Happy Set)  & colored it with Zig Real Brush pens. The sentiment is one single stamp, so a masked a part of the sentiment & stamped as desired. 


NBUS Challenge#9 (NBUS is the new Coffee Stamp set )- 29.1


Thank you so much for visiting & taking the time to comment on my blog. I love to hear from you & truly appreciate your feedback. Have a crafty day!


Friday, 23 December 2016

MERRY CHRISTMAS

Hello Friends!
In my last post for 2016 sharing two Christmas Cards, in a very  traditional Christmas color red!
For the first card I heat embossed the image & colored it with copics.


Linking this to  the following challenges


In this card I first created the red background with distress inks & stencilled over it adding some more color to get the pattern. The image is heat embossed in gold.


Playing along the following challenges  

Crafting By Design - any holiday  28.12
Crafty Calendar - Christmas 28.12
Paper Creator - Christmas 31.12
Scrapping 4 Fun: #80 Christmas  30.12
Christmas Cards All Year Round: December Anything Christmas/Holiday
Crafty Enjoyments: #12 All about Christmas 26.12
Inky Chics: #76 Christmas Card in traditional colours

Thank you all for the love, support & inspiration through the year! 
MERRY CHIRSTMAS! 


Saturday, 13 August 2016

Decoupage - Metal bucket

Hello!
I am back after a short break to share a project I made for Itsy Bitsy
I am in love with the wide range of decoupage blanks, papers & glue available at Itsy BitsyDecoupage glue is available in both glossy & matte finish, this glue is acid-free and can be used  as a topcoat and sealer. It can also be used on surfaces such as wood, metal, glass, paper & fabric (not wearables). This glue is great for image transfers and sealing quilled embellishments as well.  
My DT kit included a galvanized tin pail, decoupage glue & some gorgeous decoupage papers.


                                                                  Here is how I used them - 


Hope you like the final outcome too!
For all the details regarding the project & the products used, hop over to the blogpost here
Have a great weekend & happy crafting!

Thank you so much for visiting & taking the time to comment on my blog. I love to hear from you & truly appreciate your feedback. Have a crafty day!

Thursday, 9 June 2016

Watch Box - Decoupage

Good Morning & welcome back!
Its another decoupage share today. This watch box was a gift to a dear friend. 
Sometime back I made a wall planter using textures & metallic shades & loved the color. I have used the same color here too.
The newspaper print is a gift wrapping paper I had picked on a trip to Sri Lanka some years ago, yes I am a hoarder! Used the same acrylic paint to add some stencilled patterns on the lid.


Embellished the inside of the lid with MDF alphas & a intricate clock.


Sharing this at - 
Crop Stop#17 - 12.7

Thank you so much for visiting & taking the time to comment on my blog. I love to hear from you & truly appreciate your feedback. Have a crafty day!

Friday, 4 March 2016

Guest Designer @Stamplorations

Hi friends!
Sharing a tag I made as Guest Designer for Stamplorations. This card was selected a top pick at the January Challenge. Stamplorations has an amazing collection of stamps & stencils.

This month the theme is - 


And this is the sketch. 


You can use either the theme or the sketch for the challenge. For further  details please visit the post here

This is the tag I made -


For the background I used gelatos & randomly stenciled whipped spackle for some texture & added holograhic embossing powder over this for some shimmer. The highlight of the tag is a bold stamped sentiment. However, after coloring (with peerless watercolors) the beautiful digi that Shery sent me I decided to mute the stamped sentiment. So I tore a piece of vellum & glued it over this. Made some score lines on the vellum & added color to the distressed edge for added texture.

Here are some close ups of the tag - 


Do you notice the holographic shimmer here! 


Sharing this at - 


Thank you so much for visiting & taking the time to comment on my blog. I love to hear from you & truly appreciate your feedback. Have a crafty day!

Related Posts Plugin for WordPress, Blogger...