Showing posts with label tissue. Show all posts

Friday, 15 June 2018

Decoupage Serviette Holder

Hello Friends!

Decoupage is a very versatile craft & the possibilities it offers is endless. I enjoy giving a makeover to old objects as much as turning new decoupage blanks into unique home decor items.
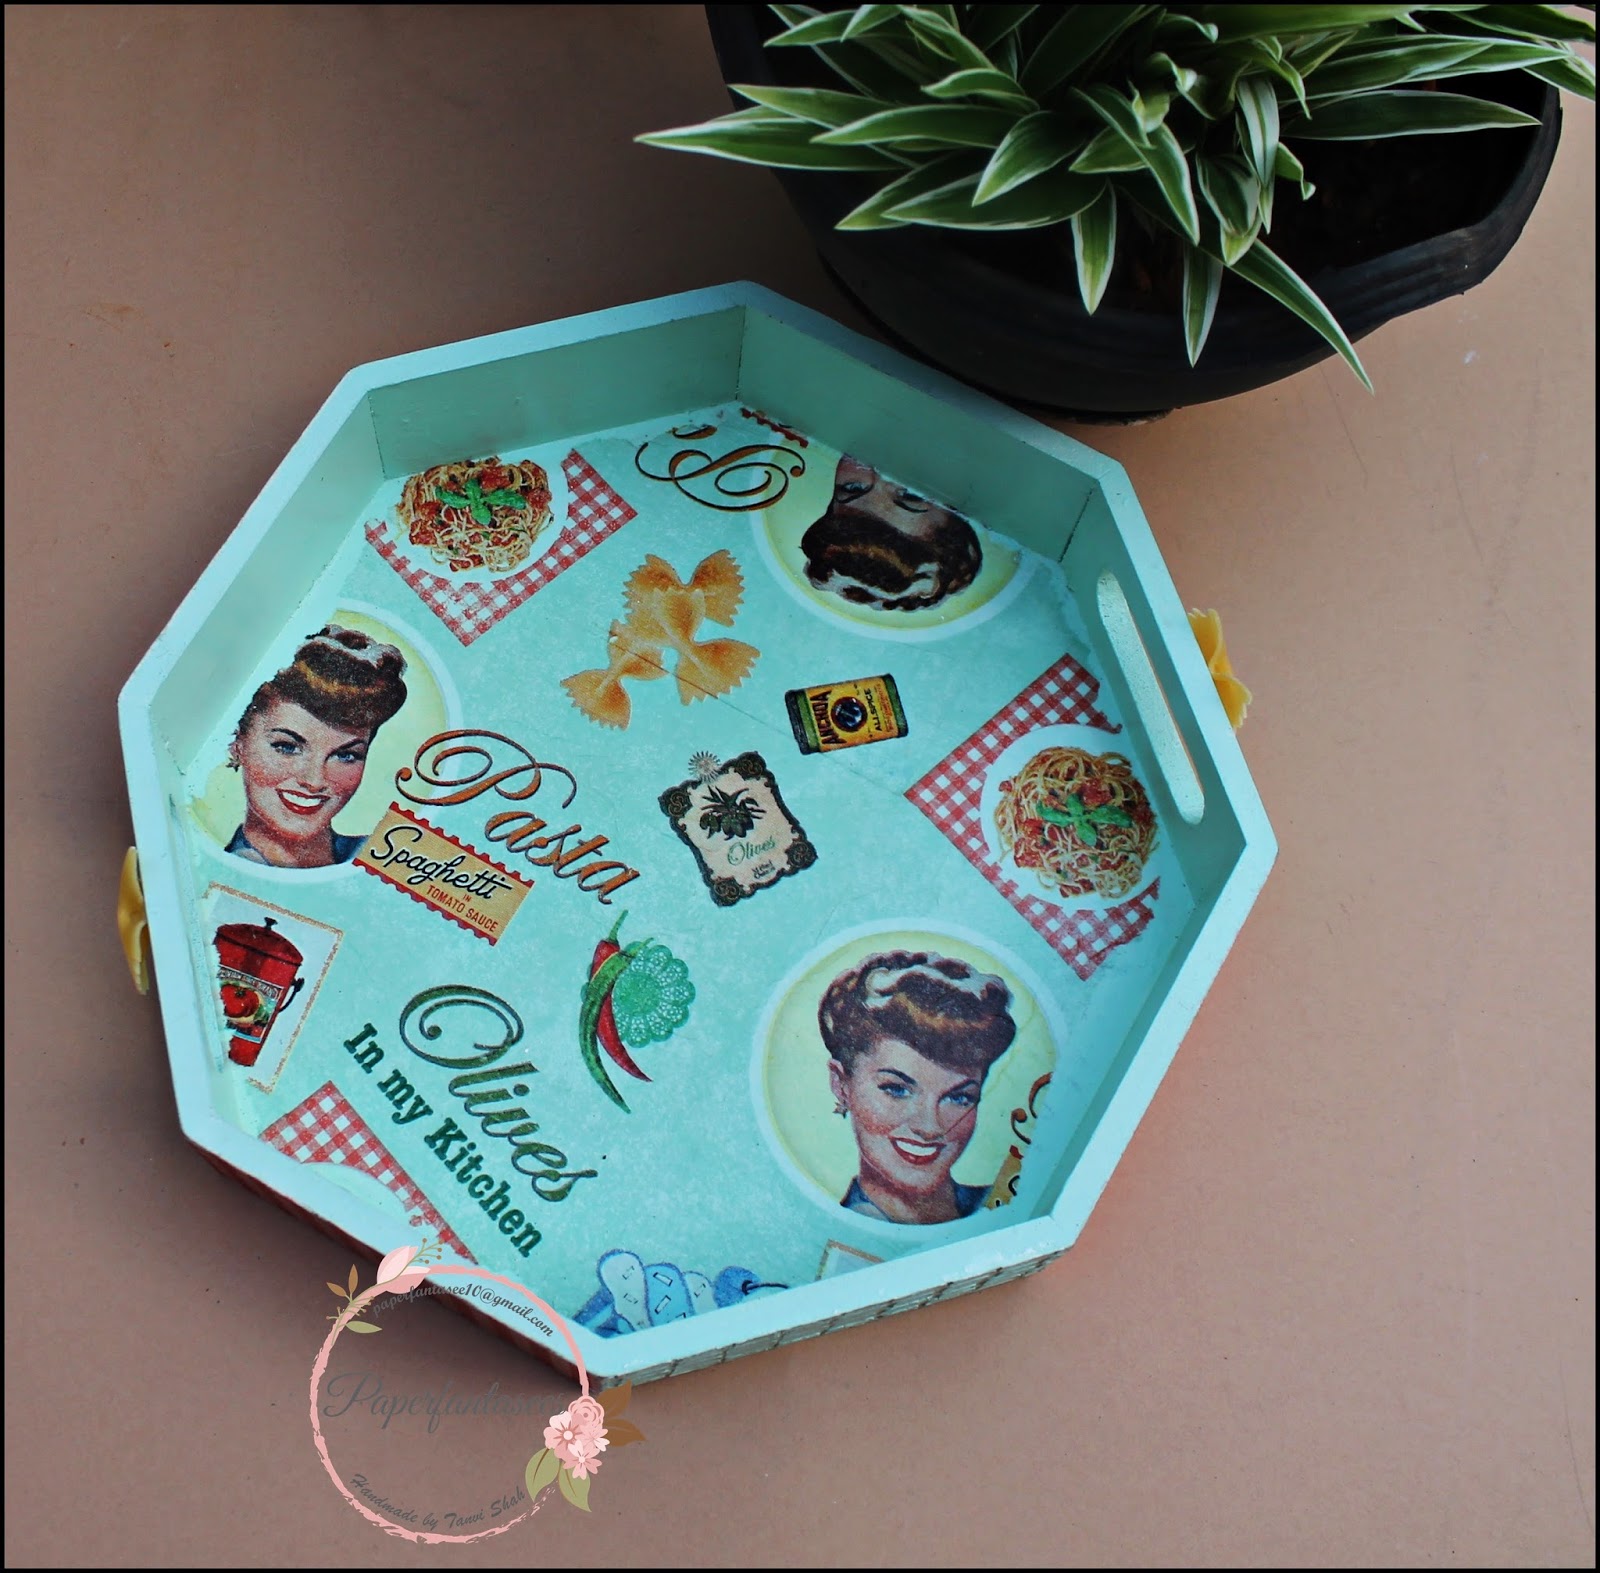
This is the serviette holder that I have in my post today -


To create the texture I have used FolkArt Home Decor Squeegee/Comb
Let me take you through the steps briefly -
  1. Lightly sand the tissue box. This gives the paint and glue some teething.
  2. Paint the sides with Papericious - Duck Egg chalk paint & the top of the box with white acrylic paint using a sponge brush.
  3. Next add a layer of red acrylic paint on the sides & carefully run the squeegee through it while still wet & you get a beautiful striped texture. Let dry.
  4. Tear the select tissue to size & glue it on the top of the box with Mod Podge Matte. Seal with another layer of Mod Podge.
  5. Follow this with 2-3 layers of varnish. Sand between layers for a smooth finish.


Thank you so much for visiting & taking the time to comment on my blog. I love to hear from you & truly appreciate your feedback. Have a crafty day!

Thursday, 26 April 2018

Decoupage Tray

Hello Friends!
Sharing my first post on the Letz Craft blog, so happy to join a bunch of talented ladies.
Here is look at my first project - 


Please visit the blog HERE for more details.

Thank you so much for visiting & taking the time to comment on my blog. I love to hear from you & truly appreciate your feedback. Have a crafty day!

Thursday, 15 February 2018

Mixed Media - Door Hanger

Hello & welcome here!
Sharing a mixed media altered door hanger today.
Had started work on this a couple of weeks back & it was sitting on my table all this while, screaming to be finished. I totally loved the outcome - black & copper, a combination which always mesmerizes me!


The base textures are using tissue (the white ply left after all my decoupage projects!) & modelling paste. I used black soot chalk paint from Itsy Bitsy & the copper is metallic paste from Art C


The dream catcher is a chippie from Papericious. The flowers, butterfly & die cuts are from my stash. 


Some more mixed media projects are here, here & here. 

Sharing this at - 


Thank you so much for visiting & taking the time to comment on my blog. I love to hear from you & truly appreciate your feedback. Have a crafty day!

Wednesday, 11 October 2017

Fun with New shades of Chalk paints - 1

Hello Friends!


This is Tanvi here & its a pleasure to be back with some decoupage inspiration using the new shades of chalk paint. In all there are 24 shades, perfectly selected for a decoupage lover like me to make shabby & distressed projects. Thank you Itsy Bitsy for introducing the first Made in India chalk paints.

These were the 14 shades launched earlier this year - 


The10 new additions to the matt chalk paint range are -


When it comes to decoupage these paints score over acrylics because
  • they give very good coverage
  • are easy to blend & sand to give a super smooth finish
  • Consistency is just right for use with a roller, sponge or brush
  • they work on glass, wood, metal, mdf & acrylic too
  • being lead free they are also eco friendly
    I have a few projects to share today using these 4 shades in my post - sand stone, whipped seafoam, wild wasabi & muted teal.


    Lets begin with a quick reverse decoupage tutorial on an acrylic coaster.

    1.Select the tissue & tear the design you want to use.
    2. Decoupage the tissue on the backside of the coaster (right side facing the coaster). Remove any air bubbles/wrinkles & let dry.
    3. Apply another coat of decoupage glue to seal the tissue. Let dry completely.
    4. Next, stencil a pattern over the tissue, using a sponge blender.


    5. Paint the coaster (whipped seafoam). This is the final layer of paint. Once it is dry, seal with several coats of varnish. Sanding in between layers for a smoother finish.


    6. Now the coaster is finished & this is how it looks.


    I was not able the capture the subtle stencilling on camera but I loved the muted pattern.


     I love the ease with which I can paint over a metal surface with chalk paints. Sharing a metal planter, in which have used sand stone, this shade was so close to the tissue background.


    Next I have a tray with a distress finish. in which I have used fortune cookies, not from the recent release but nevertheless my favorite shade.


    Distressed base of the tray.


    Stay tuned for my next post where I share an easy tutorial to get this distressed look.

    Thank you so much for visiting & taking the time to comment on my blog. I love to hear from you & truly appreciate your feedback. Have a crafty day!

    Wednesday, 27 September 2017

    Decoupage ideas with Craftreat Stencils

    Hello Everyone!
     I am delighted to be Guest Designing for the Craftreat Blog today with some decoupage inspiration using the Craftreat stencils. 
    I am in love with the designs, very well thought of & planned, the Indian designs are just in time for the festive season. I had loads of fun playing around with them & hope I tempt you to grab these designs too.
    This is a picture heavy post, I have not 1 or 2 but 7 projects to share 😊

    First I have a set of coasters using my favorite Indian themed design - Mandala


    Next is a decorative magnetic chopping board in which I have stencilled the mandala to give a gradient look.


    Here is a closer look, gorgeous isn't it?


    The Indian motifs stencil was just perfect for this shabby mirror. In this I have used texture paste.


    A close up of the stencilling, do you see the perfect design?


    The Buddha stencil is my absolute favorite. Once again I used it with texture paste & the design imprint is flawless. 


    To pop the Buddha design I used inkagold over the stencilling, this just pops the image,adding some more dimension.


    For this decoupage wallet I have used Damask Background..


    This is such a versatile design, the stencilling blends so well with the tissue.


    Priya also sent me some bangles & pendants for decoupage. I went with the traditional rice paper decoupage techniques & colors on them, the result a very shabby bangle & pendant with some fantastic crackle texture.


    Hope you are inspired to grab some of these!
    You can buy all the stencils here.
    Thank you for stopping by!


    Sunday, 16 April 2017

    Decoupage - Letter cum Key Holder

    Hello Friends!
    If you are following me you know of y love for decoupage! I love altering & creating home decor items using serviettes & papers..........................the transformation of ordinary mundane objects with decoupage is priceless.
    Today's post the transformation of a MDF letter cum key holder. The color of this dinner napkin with the bird house print is so pleasing & is sure to bring cheer.

    Here are the steps in brief - 


    • I started with a base coat of Itsy Bitsy chalk paint charcoal on the sides & lower part of the holder.
    • Once dry I added crackle medium randomly on the two sides & over the bottom panel with hooks. This was followed with a coat of chalk paint - frozen ice.
    • Next I tore the word 'welcome' from the tissue & decoupaged it on top for a faux a hanging plaque & the bird houses were decoupage at the bottom of the slots.
    • After this I used the paint to merge the tissue with the background.
    • I added some more textures to this project by dry brushing with black paint & stenciling (rolling stones) with snow chalk paint.
    • Several coats of varnish with sanding in between completed this key holder.


    You can see my other key holders here & here.

    Sharing this at - 


    Thank you so much for visiting & taking the time to comment on my blog. I love to hear from you & truly appreciate your feedback. Have a crafty day!

    Monday, 18 July 2016

    Decoupage - Wine bottle holder

    Hello Friends!
    Sharing another decoupage project today, a wine bottle holder. This was a result of some experimentation & I call it the double decoupage technique. I had a beautiful pattern paper with wine bottles in my stash & also a tissue napkin with bottle. Selecting either one was difficult & finally I used both in the project! A happy me!
    To begin I primed the base with gesso followed by a generous coat of acrylic paint & let dry.
    I adhered the pattern paper to the front of the holder using mod podge.  The wine bottle & glass motif  on the tissue were carefully cut & glued over the pattern paper (which sort of formed the background now). Take a closer look at the image below & you will see both the images!


    Another reason why this is a double technique is the two types of crackle textures - the finer one was attained with a crackle medium & the larger bold are by stamping. Some more works with crackle texture can be seen in this laptop table here, a tray here & a chopping board here.


    Had a lot of fun experimenting here! Would love to know your thoughts!

    Sharing this at - 

    Thank you so much for visiting & taking the time to comment on my blog. I love to hear from you & truly appreciate your feedback. Have a crafty day!
    Related Posts Plugin for WordPress, Blogger...